
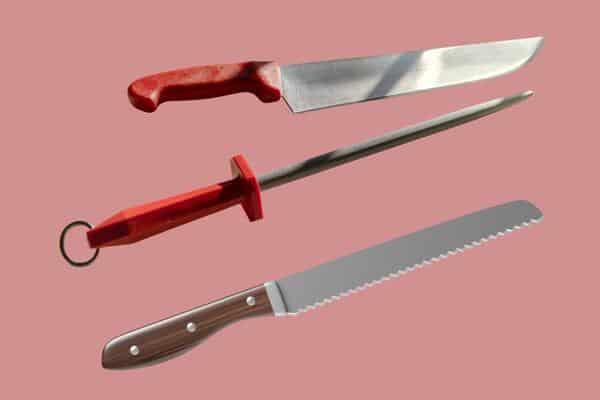
Bread knives are far from being the most used tool in the kitchen. However, a usual knife with a flat blade cannot do such a clean job of cutting bread (or any other food with tough outer layers).
Thanks to the comparatively less usage and serrations hidden beneath the teeth, bread knives only require sharpening sometimes. Nonetheless, that necessity is bound to rise at one point, and we’re bound to be confused.
How do you even sharpen the serrations? Is it worth sharpening, or are you better off buying a new one? What material should you sharpen it with?
Let’s answer all those questions and more today. I’ll cover how to sharpen serrated bread knives, when to do it, and what you should use for it.
Should You Sharpen Your Bread Knife?
This is a crucial question, and the answer is a resounding no in many cases. But if you’re wondering if you can sharpen bread knives, the answer is yes.
Most decent serrated knives come with serrations on one side while the other remains flat. Cheaper options sometimes have serrations on both sides, and you shouldn’t waste your time trying to sharpen those.
Another aspect is the teeth. If the knife’s teeth are way too rounded off to bite through ingredients, chances are you won’t be able to restore it (or it’ll take more effort than it’s worth). In such cases, reconsider your options.
Other than that, any quality bread knife can be sharpened with a bit of effort. I think it’s worth buying a premium knife and sharpening it instead of buying cheap ones and replacing them often.
So, when should you sharpen a serrated knife?
I recommend sharpening the knife before the sharpened edges get too dull. The longer you wait, the more effort it takes, and the lower your chances are of restoring the edge.
Try cutting a loaf of bread. If the cuts aren’t clean, you should try sharpening the blade. Or, try reflecting light on the edge. If it’s too reflective, that indicates a dulling blade.
Choosing the Sharpening Tool for a Bread Knife
You can’t sharpen knives with serrated edges through conventional methods like whetstones. Instead, we have to use sharpening rods that can get between the teeth.
Sharpening steels or rods are essentially thin rods made with coarse materials that can sharpen a blade.
Note that a honing rod is a different tool. It doesn’t have too abrasive materials, meaning it won’t remove any steel from the blade. As a result, it can merely align the burrs of your knife at best, not sharpen it.
What we require is a sharpening rod. Usually, you’ll find ceramic or diamond-coated tools. Ceramic steels are not as coarse as the diamond coating and won’t remove as much steel.
If your knife isn’t too dull, consider buying ceramic steel. However, it would require much effort if the serrated edges became too dull.
Consider getting the coarser option in that case. The diamond coating removes more material at once and sharpens a knife faster.

The Diameter of the Sharpening Rod
The rod’s diameter needs to match the size of the serrations to sharpen the whole edge. Ensure that the knife will accommodate that size.
In most cases, sharpening steels are tapered to minimize compatibility issues. The base is thicker for larger serrations and keeps getting smaller near the top. For usual bread knives, you shouldn’t have any trouble with the diameter.
However, if your knife is unusually small, you may have some issues. I usually advise getting knives with larger serrations. Not only are they more compatible with sharpening rods, but they also require less effort to sharpen.
Guide to Sharpening a Bread Knife
Now that we have the right tools, let’s move on to the sharpening process.
- Take the knife and locate its beveled side. Whether you hold this knife in your dominant hand depends on which element you’ll move — the knife or the rod. Let’s say you’re going to move the rod itself, in which case the blade should be in your non-dominant hand.
- Many users prefer moving the knife against the rod. While that’s fine, I found that moving the rod usually provides more control and stability.
- Now, hold the knife against the rod at an angle. This angle should emulate the grinding angle of the blade’s bevel. Sharpening at the wrong angle can be counterproductive.
You can create marks with a marker along the blade’s edge. That way, you’ll know that you’re doing it correctly if the marks begin to disappear when you sharpen.
- If the rod is tapered, ensure that you’re holding the knife where the serrations match the rod’s diameter. You could even get away with a smaller diameter, but something larger will expand and ruin the gullet.
- Begin moving the rod back and forth against the knife (or vice versa, depending on your preference). Unless the blade has become fairly dull, you wouldn’t require more than eight to ten passes with each serration.
Keep repeating this step for each of the gaps. Try to make a similar number of passes for each to maintain consistency.
- Assuming that the process went well, you’ll see burrs appearing on the flat side of the knife. Try feeling them with your fingers. If the burrs don’t appear, you may need to do a few more passes.
- Once you’re done sharpening, gently remove that flat side with the burrs and slide it against the rod. We’re not sharpening the flat side but only aligning the burrs by honing it. It only requires a pass or two — without much pressure. You could also use fine-grit sandpaper or a leather strop for this.
Remember, going overboard is a risky business. I’ve seen many users remove too much of the steel with coarse diamond-coated steel. Unless you’ve got the experience, check the blade out after every few passes. That way, you’ll realize that you’re filing away too much material before a point of no return.
Secondly, store your knife safely. Bread knives lose more of their sharpness due to lousy storage instead of the usual wear and tear, as the edge is hidden beyond the teeth.
Should You Sharpen Bread Knives with Electric Sharpeners?
Here’s a question we see more than we should. To that question, my answer would be an ambiguous no. Let me explain.
Due to their unusual shape, most electric sharpeners can’t even sharpen serrated knives. Those sharpeners are already out of the equation.
Some higher-end electric sharpeners come with separate slots for bread knives. Even then, I’ve found that those slots don’t provide the same level of versatility as a sharpening rod. And that lack of control results in inconsistent sharpening.
Hence, I would recommend avoiding electric sharpeners for bread knives, even if they have slots for serrated blades. They also shave off more material than necessary, thereby shortening the product’s lifespan.
6 Ways to Keep a Bread Knife Sharp
Don’t worry, it’s not too difficult. Just follow these steps to the tee and you’ll find it manageable. I’d advise you to follow them all. However, things might need a bit of “Getting Used To.”
1. Use the Knife How It Was Intended
This is a fundamental requirement that most users don’t abide by. A bread knife is specialized in every aspect of the word, and one must use it in that manner.
Most bread knives don’t use steel of the same hardness level on the Rockwell scale as some high-carbon Japanese steel, which makes things riskier.
For instance, many users try cutting frozen foods or such tough ingredients with their bread knives. That alone can dull the serrated edges of the blade. Along with the sharp teeth, you also risk dulling the beveled side of the knife.
Doing these reduces your knife’s sharpness almost instantly. That also means you shouldn’t use the blade on other materials — like using it as a box cutter.
Too much pressure can misalign the edges, reduce their sharpness, and even cut their longevity short.
Another aspect is cutting in the right manner. While you need to push the blade downward with a standard straight-edged knife, that’s not the case with a bread knife. Instead, you have to cut with it in a back-and-forth sawing motion.
That allows you to cut through ingredients without putting too much stress on the blade. Additionally, the cutting process is far more efficient that way, allowing the blade to remain sharper for longer.
2. Using the Correct Cutting Surfaces
Where you use a serrated knife is just as crucial as how you cut with it. Hence, the cutting surface, which usually is a cutting board, has to be ideal.
A basic rule of thumb is to get a chopping board that is much lower in toughness than your bread knife. If it’s too hard, it can dull the knife every time you cut on it. In a worse case, it can even physically damage the blade.
Glass or marble cutting surfaces are two of the worst culprits in these terms. These are quite hard and can affect the blade negatively. Instead, try using cutting boards made with plastic (food-safe, of course) or grained wood. These are much softer and help prolong the knife’s sharpness.
3. Cleaning after Usage
One of the easiest ways to have your knife rust is not cleaning it after each usage. That allows food particles, and eventually moisture, to cling to the metal.
And regardless of your knife, moisture is bad for it, especially if it’s made of high-carbon steel. These bread knives require strict maintenance, and you should clean them up as soon as you’re done working. Otherwise, the blade corrodes and loses its sharpness.
Don’t think that a stainless steel bread knife is safe from that consequence, either. These knives are more resilient against corrosion but are not invincible either. Hence, don’t leave anything up to chance, and wipe the blade afterward.
4. Washing and Storage

Many manufacturers will claim that you can wash their knives in the dishwasher. While that is technically true, that’s not the ideal cleaning solution for a bread knife.
Firstly, the heat inside the dishwasher can harm the steel’s tempering and may cause it to become increasingly brittle. Additionally, the risks of rust and corrosion are higher as well — all of which hurt the knife’s steel and its sharpness.
Hence, I’d always recommend handwashing your serrated knife, even if it’s made with stainless steel. Use warm water and mild detergent to clean it up, and the blade will thank you.
What comes next is storage, which is just as crucial. Firstly, don’t store the knife along with a thousand other cutleries in a packed drawer. That increases the chances of dents and bumps, which physically hurt the blade and ruin its sharpness.
Try investing in a proper knife storage block, which keeps the knife safe. Make sure that the knife is dry and clean before you store it. Otherwise, storing it in the block wouldn’t help much, and it would still gather rust.
5. Honing the Burred Blade
When you use a knife — regardless of its type — it results in burrs along the edge. These are merely slight misalignments along the knife’s blade and don’t necessarily dull the blade.
However, these misaligned edges keep getting worse as you keep using the knife without maintenance. Consequently, you try to put more pressure on the knife to compensate for that lacking, which continues the circle.
That’s where honing comes in. Take a honing rod with fine grit and run it along the knife’s beveled edge. Usually, the bread knife will only have one side beveled, which makes the job slightly more manageable.
You only need one or two passes for each gullet, and that should get the misaligned edges back in place. Once you’ve done that for the whole knife, you’ll notice a slightly raised edge on the opposite side of the bevel. Give it a slight rundown on a fine whetstone (a rod works, too), and you’re good to go.
Note that the honing rod shouldn’t use anything too coarse, like diamond-coated ones. That will remove a lot of material from the blade, reducing the knife’s longevity. We’ll discuss more on that below.
6. Sharpening in Time
It’s somewhat obvious that you need to sharpen a blade to keep it sharp, no?
But there’s more to it. You should sharpen a knife at the right time — not too early, not too late. Sure, sharpening the knife frequently would technically keep it sharper, but you’ll gradually ruin its capabilities.
Firstly, the gullets in the blade are of a specific shape. When you sharpen the knife, you take material off its edge, meaning that the space between each tooth becomes smaller. As you know, the depth of the gullets is highly crucial in helping a bread knife cut more efficiently.
Secondly, sharpening the fine teeth too frequently can also reduce their strength and make them brittle. That directly harms their capability of holding sharpness for longer.
On the other hand, waiting too long to sharpen the bread knife can be detrimental. You have to put more pressure to make the dull edges cut through and make the teeth even duller. As a result, the gaps between the teeth become smaller with time.
Moreover, you’d require more aggressive sharpening if you’re late to the process. That takes more material off the blade than would’ve been necessary.
That’s why it’s paramount that you sharpen a bread knife during the right time frame to retain its sharpness.
My Last Two Cents
Many of us are willing to replace a serrated bread knife rather than go through the process of sharpening it. However, sharpening a bread knife is more complex than it seems.
As long as you’ve got a quality knife (that can still be saved) combined with the right equipment — all it takes is a bit of effort.
Still choosing a knife? Read how to buy a bread knife.


